


3D Printed Mini Long-range FPV Platform & LOS Trainer!
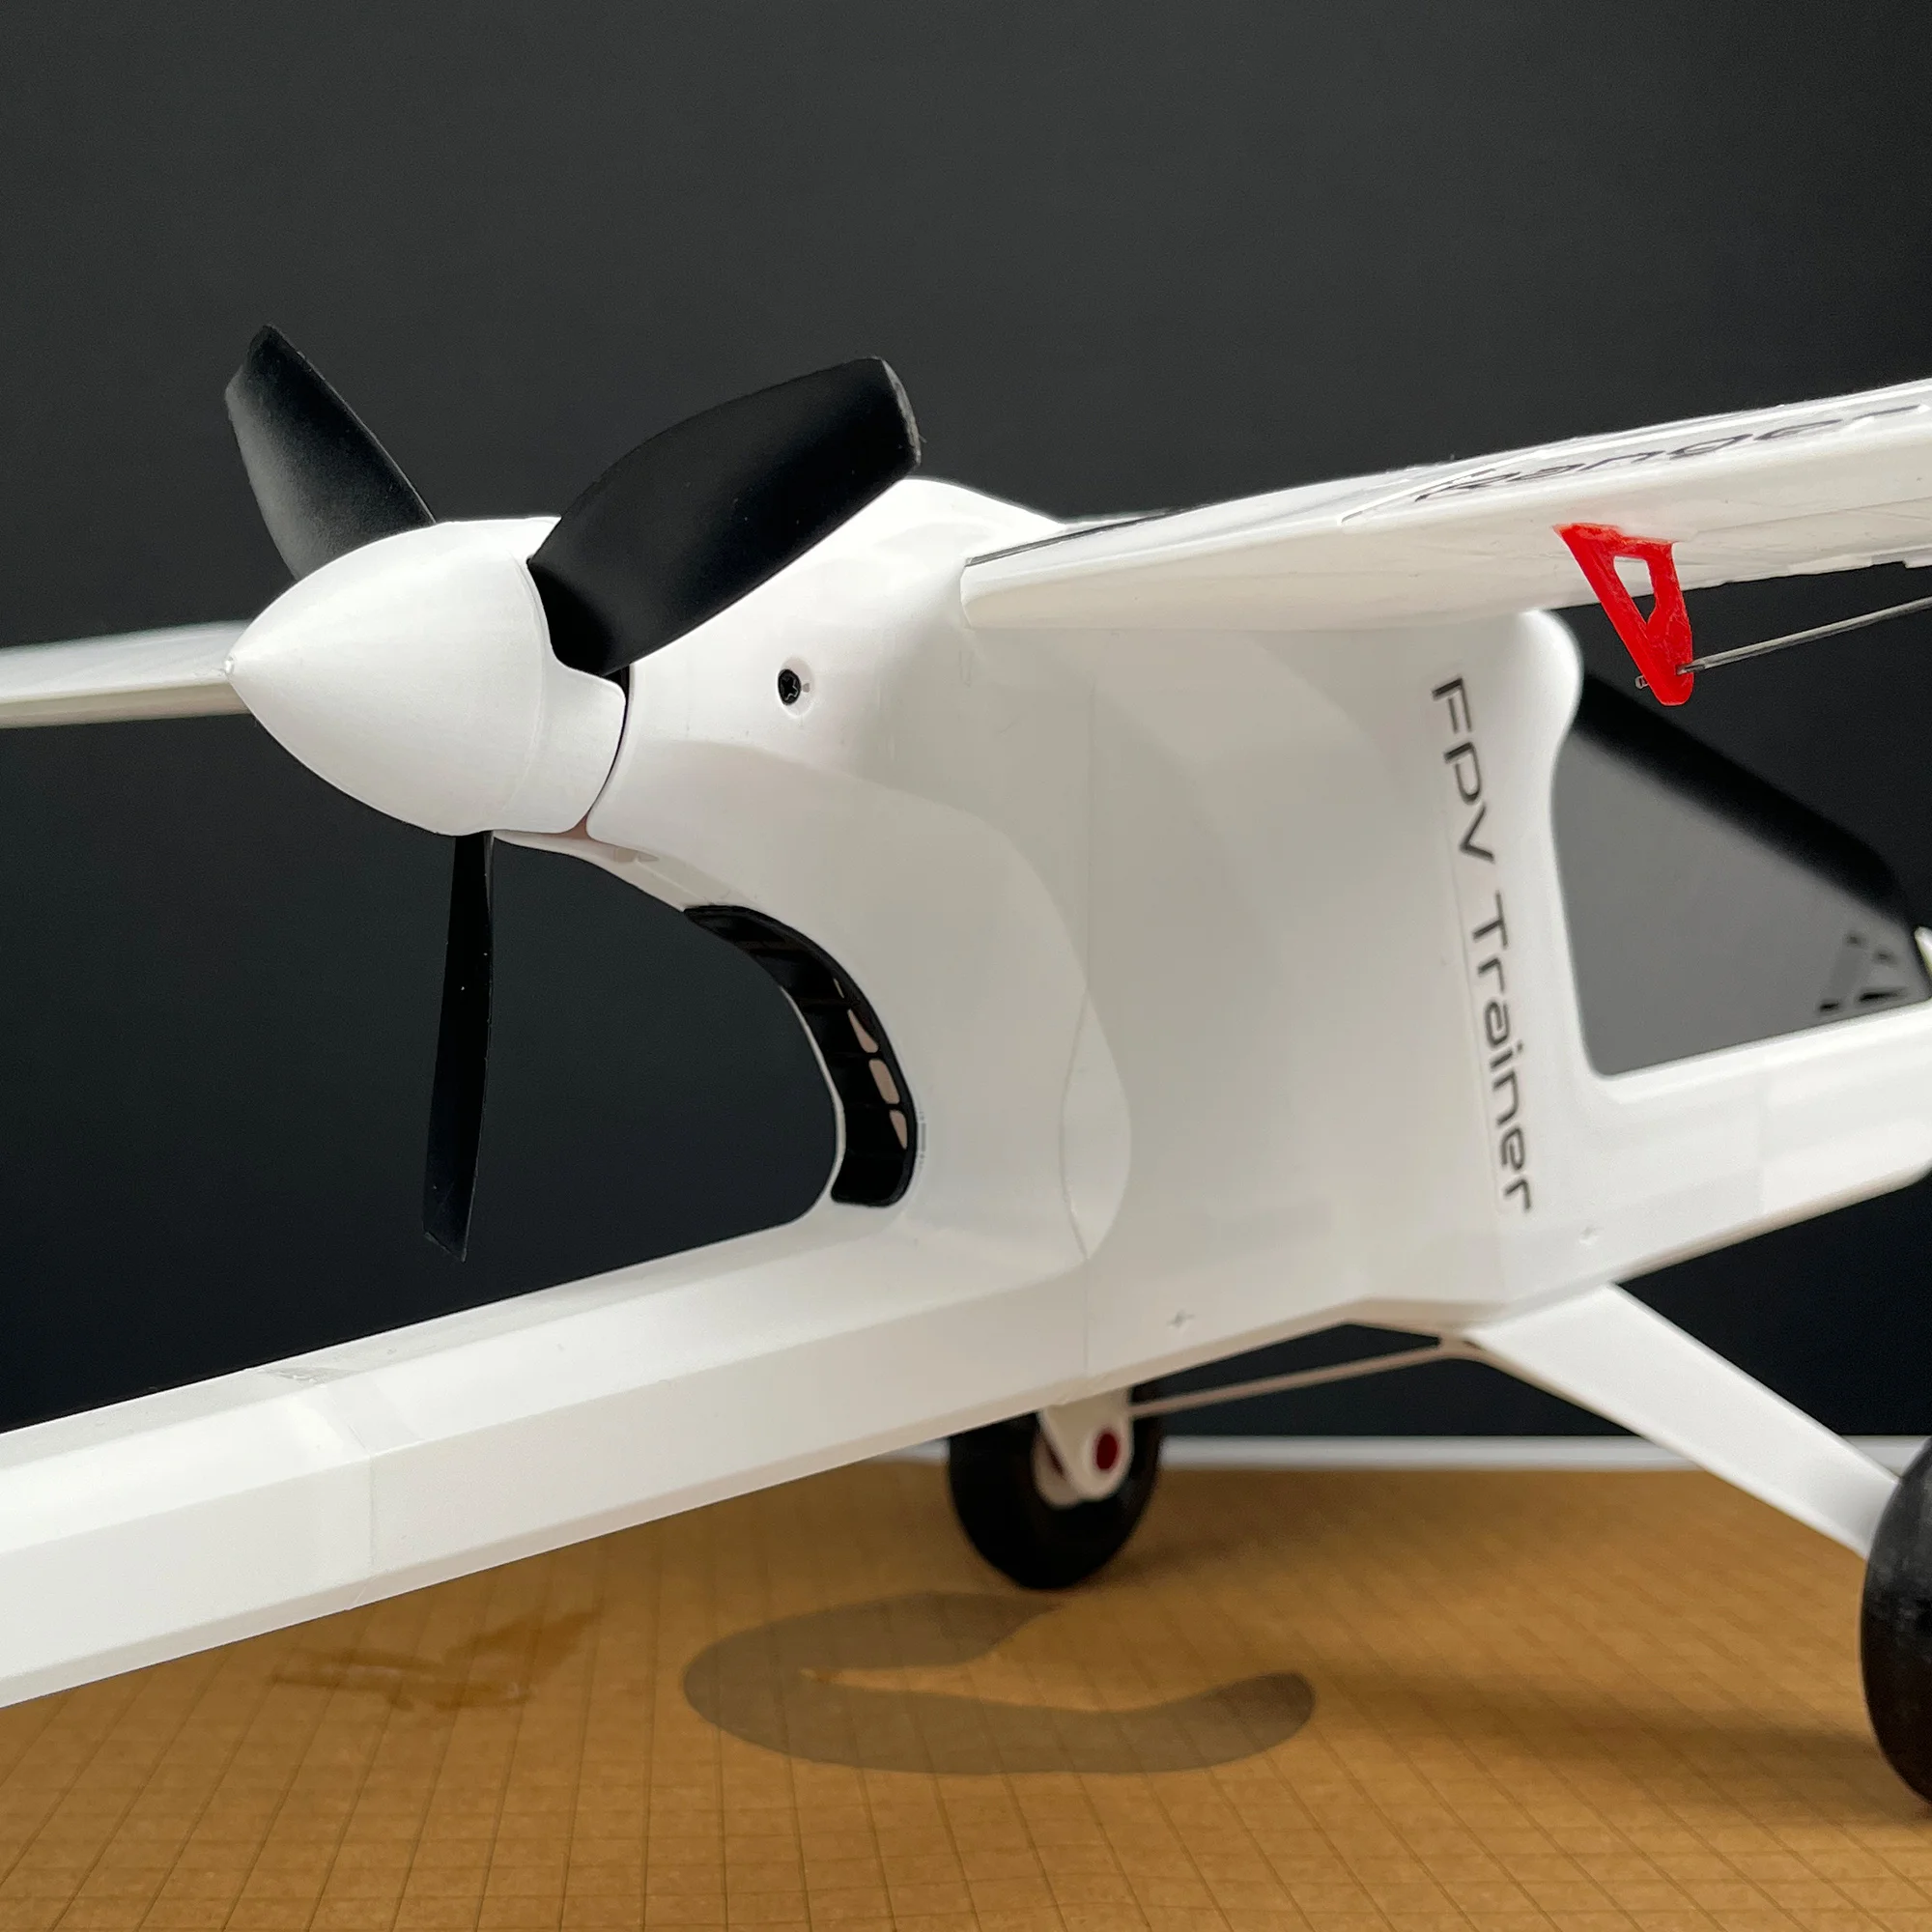
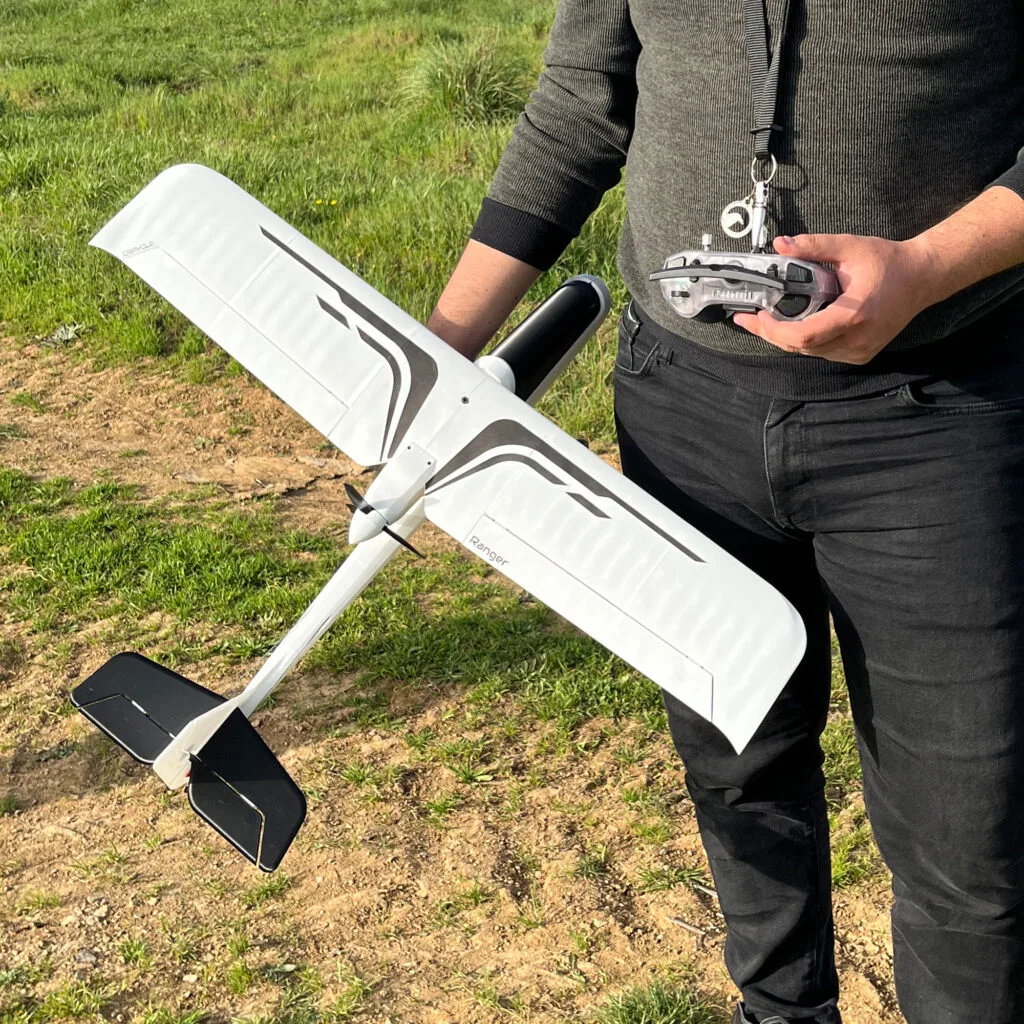
Ranger V3 is a next-generation FPV trainer built for beginners and explorers alike. Unlike many planes, it requires no carbon rods and comes with a fully 3D printed landing gear system, making it one of the easiest and most affordable 3D printed planes to build. Strong, stable, and lightweight, Ranger V3 is your perfect entry into the world of RC and FPV flying.

📦 Included in your download
- STL files - Optimized geometry for strength, lightness, and easy assembly
- 3mf project file - Bambu, Creality, Orca, and Prusa Slicer compatible
- Settings Table - Verified settings for easy setup across slicers
- Decal Files - Ready to cut graphic designs in PDF and SVG formats
- Inav Config - Skip the guesswork and fly with proven configurations (Coming soon...)
- Technical support – Expert help to solve problems and keep you in the air
- Lifetime updates – Our models evolve, so you never get left behind
General Specifications
- Length: 600 mm (23.6 inches)
- Wingspan: 800 mm (31.5 inches)
- Print Weight: 309 g (10.9 oz)
- Flying Weight: 570 g (20.11 oz)
- Wing Area: 11.8 dm²
- Wing Loading: 48.3 g/dm²
- Airfoil: NACA 2412
- Min Printer Size: 180 mm³
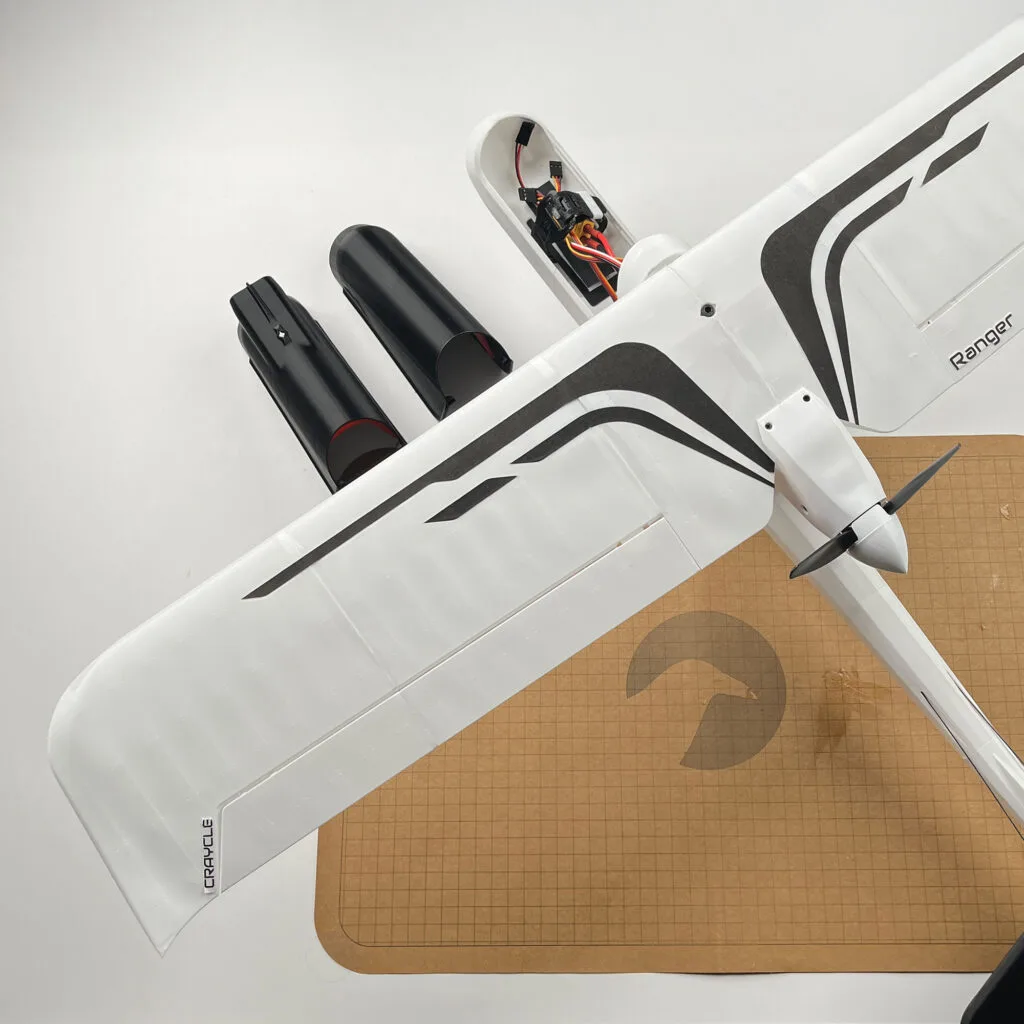
- Material:
- Regular PLA: Body
- PetG: Electronic Brackets
- TPU: Hinges
Recommended Electronics
- Radio: 4ch+
- Motor: 2205 2300KV brushless motor
- Propeller: 5040, 2 Blade
- ESC: 30A 3-4S
- Battery:
- 3S 1300 mAh LiPo
- 3S1P 18650 Li-ion pack
- Servos: 4 × 9 g
- Adhesive: CA Glue
Buy a Craycle Power Pack for electronics.
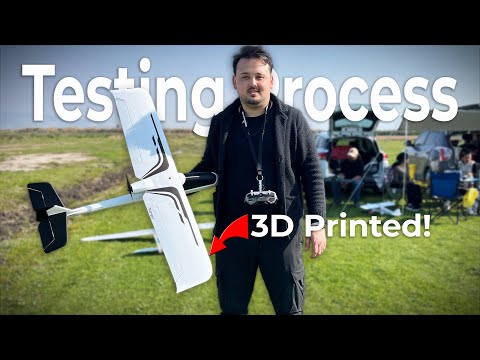
✈️ Easy to Print and Fly
Ranger V3 is fully optimized for Regular PLA printing. With fewer parts, no carbon reinforcements, and modular 3D printed landing gear, it is quick to print, easy to assemble, and forgiving in flight; ideal for both training and casual FPV flying.

🎥 FPV Ready
Designed with a dedicated canopy and optimized airflow, Ranger V3 supports both analog and digital FPV systems. Whether you’re practicing line-of-sight or stepping into immersive FPV, Ranger is ready to adapt to your flying style.
⚡ Stronger and Smarter Design with V3
- Nose-diving problem solved
- 100 g lighter than V2 with a larger wing area
- New dihedral wings for added stability
- Optimized aileron, elevator, and rudder controls
- Durable 3D printed landing gear and optional bush wheels
- Float-ready for water takeoffs and landings
🌍 Multi-Material Compatibility
Although optimized for PLA, Ranger V3 can also be printed with LW-PLA, PETG, or ABS for different flying needs. Print fast and strong with PLA, go lighter with LW-PLA, or choose PETG/ABS for hot climates and durability.

🔄 Lifetime Free Updates
Like all Craycle models, Ranger comes with lifetime free updates. From V1 to V2 to the all-new V3, every generation has been improved and shared with our community—ensuring your model always evolves.
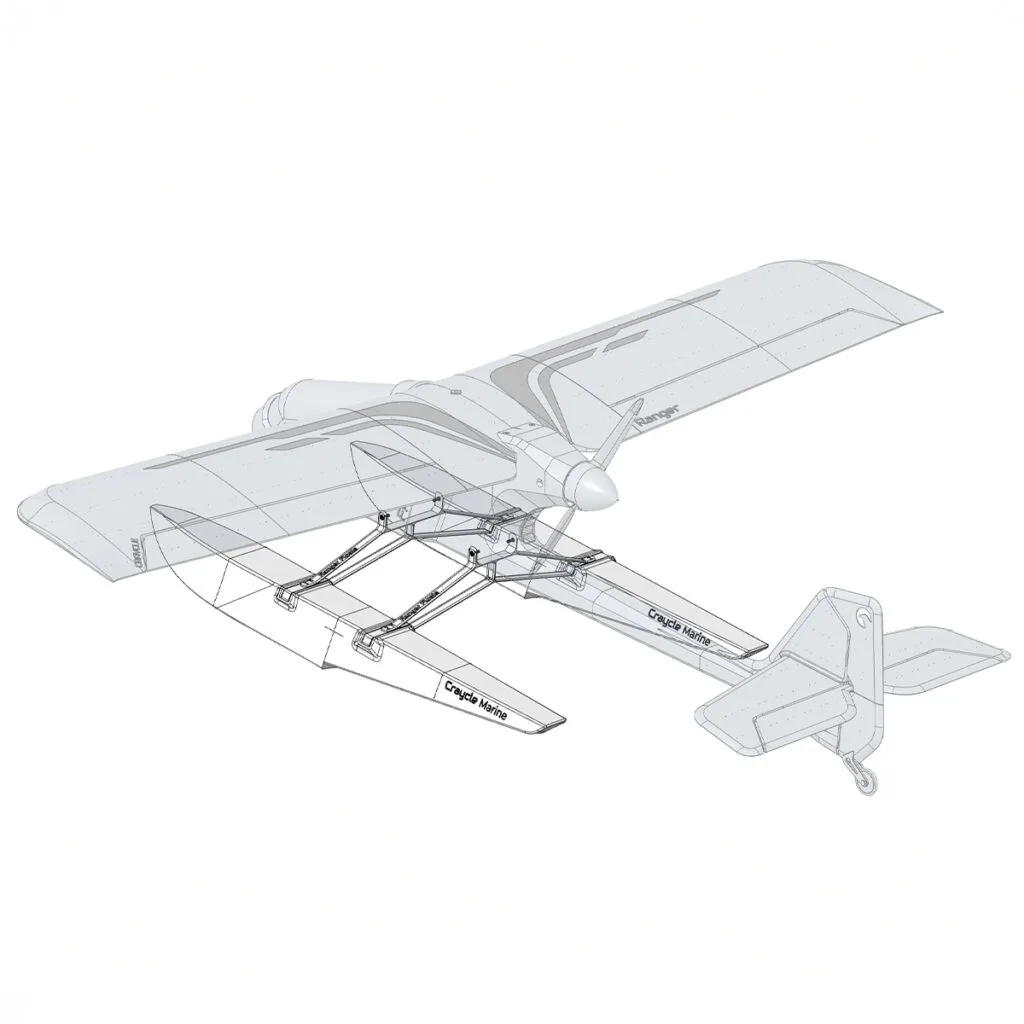
🚤 Float Option Available
Extend your Ranger V3’s capabilities with optional 3D printed floats, perfectly designed for seamless water takeoffs and landings. This add-on transforms your plane into an amphibious trainer, allowing you to fly from lakes or ponds without compromising performance. Buy floats!
Why Choose Ranger V3
Ranger V3 is designed to be the most accessible 3D printed FPV trainer. With no carbon rods, fully printed landing gear, and stable flight characteristics, it’s the perfect model for beginners—and still exciting for advanced pilots who want a reliable FPV explorer.
Download the Ranger V3 STL files today and start flying with a trainer plane that grows with your skills.
You can also scale Craycle Planes 👇
sergeioprishko (verified owner) –
I have tried to print a lot of different planes using LW PLA, but never had any success flying them, they were too fragile to survive landing. So I decided to try the Craycle Ranger, as it was designed specifically to be printed from regular PLA. I used PLA, PETG, and TPU. I have to say, the model design is awesome: it was very easy to print and assemble, the instructions were clear, and all the parts fit together without any problems. And it was the first time a 3D printed plane of mine survived its maiden flight! That said, this plane is not for beginners, it’s quite small and heavy, so you need to keep up the speed for a steady flight. For the maiden flight I also didn’t use the landing gear to reduce weight. Either way, I don’t want to go back to LW PLA anymore, and I’m already looking at printing another Craycle plane!
Cemal OZCELIK (store manager) –
Hi,
Thank you so much for your kind and detailed feedback, we really appreciate it 😊
You’re absolutely right. Ranger was initially designed to protect electronics with its configuration, but over time we realized it’s not the easiest model for beginners, mainly due to launch and flight characteristics.
For training purposes, our Stick model is a better choice. It’s more user friendly, easier to control, and more forgiving in flight thanks to its front propeller setup.
That said, we also love the Ranger. Its high wing design makes it one of the most stable models we have. It just performs best with proper takeoff conditions, ideally from the ground with some space.
Really glad to hear you enjoyed the experience, and excited to see what you build next ✈️
kayhussani –
I printed RC planes stl files from many websites but CRAYCLE top them all their models printed perfectly and it’s very balanced when flying.
Thank you guys for your awesome work
Cemal OZCELIK (store manager) –
Thank you so much for your kind words! 😊
It truly means a lot to hear that Craycle stands out for you, we put a lot of care into both printability and flight performance, so knowing it made a difference is the best reward.
Wishing you many smooth flights, and we can’t wait to see what you build next!
egodsey –
I am currently in the process of printing the Ranger V2, using LW-PLA (active foaming) for the wings and tail control surfaces and PLA+ for everything else. In my opinion, Cemal Ozelik has done a fantastic job in designing this aircraft.
I have printed (and flown) planes from both Eclipson and 3D Lab Print, and I believe Cemal’s design is superior. For example, the others use complex hinges for the control surfaces but very simple bearings for the landing gear. Their hinge designs add unnecessary weight and complexity with no improvement in functionality. (Foam planes have used tape for hinges for years without any problems.) My guess is that Cemal’s simple TPU hinges will work just fine while being lighter and easier to print. Additionally, Cemal’s attention to detail in the wheel bearings should improve handling during takeoff and landing without increasing the aircraft’s weight.
However, I do take issue with his insistence that the Ranger V2 can be printed entirely with active foaming LW-PLA (ColorFabb and/or 3D LabPrint PolyLight). The fuselage and canopy parts cannot be sliced and printed without retraction, which is more or less incompatible with LW-PLA. In my experience, the only parts that can be successfully printed with LW-PLA are those specifically designed to be printed in one of the “single line per layer” modes—vase mode, spiral mode, surface mode, etc., depending on your slicer. The geometry of the wings (and control surfaces) is almost always suitable for this. The aircraft fuselage would be as well if it weren’t for the critical need to reinforce the areas where the wings, motor, and landing gear attach.
Perhaps this is a design approach Cemal could explore in a future model. Typically, the engine mount is already a separate PETG part—doing the same for the wing attachment points and landing gear mounts, while making the fuselage a lightweight LW-PLA mesh print “skin/covering” for aesthetics, could be a viable solution.
One more plus for Craycle Hobby: Cemal’s documentation is very thorough. He is very careful to specify slicer settings for each part. See page 3 of the 2022 Ranger V2 User Guide and the seven-page “Print Guide” included as an appendix. Successful 3D printing is still highly dependent on the printer, slicer, and material used, and he provides all the necessary information to ensure successful prints.
Cemal OZCELIK (store manager) –
Thank you! I’m really happy to hear you appreciate the design of the Ranger V2. I’m currently working on the Ranger V3, and all models have been updated. The Ranger V3 largely fixes the nose-down issue and is 110 grams lighter.
The Ranger is great for beginners, but sometimes it can nose dive when thrown by hand. This can be solved by taking off from the ground. Even though there were some issues with the V2, it’s still a very popular and loved model.
Our new PDF manuals have much more detail, and there’s no need for special printing profiles anymore. We’re aiming to provide a better experience with Ranger V3.
Thank you again for your feedback! If you’d like to write a blog post about both Ranger V2 and V3, feel free to contact me!
alexcarterrr19 (verified owner) –
I’ve printed the Ranger V2 Sport three times now, and I’m really impressed with it! While there were some initial tweaks I had to make, the performance has been fantastic. After a few adjustments to the CG and battery placement, the plane flies beautifully and handles well on takeoff and landing. I’ve built over 10 3D-printed aircraft, but this one stands out for its design and stability. It’s been a pleasure to work on, and I can already tell it’s going to be one of my go-to models. Looking forward to flying more with this great trainer plane!
Cemal OZCELIK (store manager) –
Hi Alex, thanks for sharing your thoughts! We’re glad to hear you’re enjoying the Ranger V2 Sport.
CAMARTING (verified owner) –
I printed this model using PLA_LW from Polymaker in yellow, and it looks beautiful and is very light. During my first flight, it crashed because I didn’t adjust the CG properly; this is a very sensitive point. I always recommend using landing gear. I threw it by hand and crashed it. The reconstruction is a bit tedious due to the splices. You have to sand them very well and also reinforce them. For the rest, I hope to add the landing gear soon, install the Caddx View, and test it with the weight of that unit and a MatekSys FC.
Cemal OZCELIK (store manager) –
Thanks for your valuable comment, it is very nice to print with this model LW-PLA. It would be nice if you could share this process with other people on Facebook Craycle Crafter Group.
This model is more suitable for take-off from the runway. Takeoffs require quick throws, it’s not easy to get it right the first time. You can order it for powerful landing gear. The new PetG shafted wheel design will also ensure you get a long-lasting landing gear.